Monday, December 17, 2018

Taking a step back in time part 2: Minolta X-700

As I have said in my last post I have been bitten by the "Film Bug" and am loving the experience of shooting with some of the old film cameras that I have collected. In the last post I talked about the Yashica A TLR camera that I got as a Anniversary present from my Wife. In this post I will discuss my experience with another camera.....my Minolta X700 SLR. As with all my reviews it will be more about the feel and experience than it is about technical aspects of the camera.

The camera was introduced in 1981 but I am sure when mine was made. I don't exactly remember who I got my Minolta X700 from, it came as part of one of the groups of cameras I received a few years ago. The camera has become one of my favourite cameras to shoot with though.
From the shutter sound to the film advance, everything that goes into shooting this camera is very enjoyable. The X700 has a good weight to it, it is mostly metal and has a heft to it that you know it is there, but I don't find it too heavy to shoot with. All and all it is enjoyable experience shooting with this camera. The camera has nice feeling grip on it and is very comfortable to hold and shoot with. 

The camera has a built in meter and seems to work very well considering the age of the camera. The camera has Aperture (depending on the lens), Shutter and Program modes of shooting. I have shot the camera in Aperture and full Manual modes but haven't tried the Program mode yet. The camera doesn't have "autofocus" and is totally manual focus. It is a challenge since I am used to autofocus with my Canon T5 and rarely use manual focus but I really like focusing with the camera and lens combination I have been using.  

I especially enjoy shooting the camera with the lens I have on it. The lens I have been using is a Minolta 28mm MD 1:2 prime lens. I usually shoot it with an aperture between f8-f16 since I have been using it for street photography. The lens is a nice size, not too big, but also not too small, a good sized prime lens. I am pleased so far with the results I have gotten with this body/lens combination. 

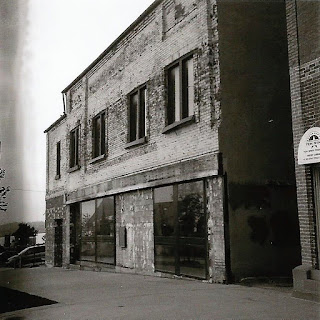
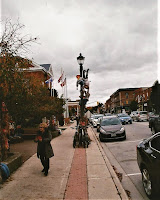
I am currently shooting my second roll of film on this camera (maybe a little too soon to do a review but since it about more about the experience than technical..). The first roll which I have gotten developed was Kodak Ultramax 400. I am currently shooting Illford HP5. The day I shot the Ultramax was a overcast day in October so the colours may not be a dynamic as I would have liked but I was happy with the outcome of the camera. 

]


(I do admit to a little digital editing of these shots)

We had stopped at a look out and a scarecrow festival (on our way back from dropping off three rolls of film to be developed. I would have liked a nicer, brighter day but all and all I am happy with the shots, the colours and sharpness are nice. 

All and all I love the Minolta X700 and the Minolta 28mm MD lens. I will post more reviews and updates about the camera as shoot more rolls of film on it. 


Sunday, December 2, 2018

Taking a step back in time: Yashica A

The only experience I had shooting with film is limited to the old 110mm point and shoot cameras. I never did any 35mm shooting when I was younger, even though my Dad tried to teach me, I thought it looked too hard. The digital cameras hit the market and I was an early adopter. I had a series of cheap digital point and shoots before I moved up to "Bridge" cameras and then eventually DSLR's.

For years though I have been collecting old film cameras, I have about twenty or so in collection. My collection spans everything from Kodak cameras from 1911 to box cameras from the thirties to Polaroids, Rangefinders  and SLR's from the eighties. But I never really wanted to try shooting them......

Until that is when my Wife bought me a Yashica A twin lens reflex (TLR) medium format camera for our anniversary (third year was leather and the camera came with a leather case, which was falling apart but the camera was awesome shape). Handling this camera and researching it on YouTube fired a desire to try shooting it. It sparked a new interest in shooting film and trying out some of the cameras I have collected.


So I decided to pick up some 120mm film and try out this amazing but really basic old camera. It is totally manual, you set shutter speed and aperture and focus and that is it. There is no meter in the camera so you either have to use an external meter (I found a good app for my phone) or use the "Sunny 16 rule" (which I also had to research to learn how it works). It really forces you to slow down and think about your shots and settings. And the fact that you only get twelve 6x6 shots per roll of film really makes you think and plan your shots. You don't want to waste them. The "viewfinder" is on top of the camera which is huge and it also has a pop out magnifier lens to help with focus. It was an interesting experience and since you are mostly shooting from waste or chest lever it really makes you think about composure. And since the top lens is the one you compose to and the lower lens actually exposes the film you need to keep that in mind as well when composing your shots. So this camera really make you take your time and really think about each and every shot. 

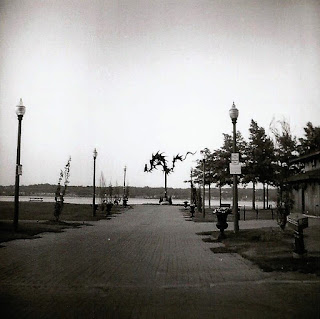
I just got my first two rolls of film back from the developer, I shot a roll of Illford HP5+ and a roll of Illford Delta 100. I have a lot of practice and a lot to learn about exposure using this camera but I am happy with my results, especially since they are first two rolls I have shot. Some of the pictures have some kind of haze or something down the left side, but not all have it so I think it was something to do with that roll of film(the lab mixed them all together so I have to check the negatives to see which roll had this issue). But all and all I am happy and I really enjoyed shooting this camera and will be doing a lot more shooting with it. 

Here are some of the shots I got with this camera. They definitely have a "Look" to them that would be be hard to replicate with a digital camera. 


Like I said I really love this camera and it will be getting a lot more use. I want to try colour film in it as well. And it has sparked my interest in shooting more film cameras. I have two 35mm cameras that I have been shooting as well that will each get there own post. I really regret not doing this earlier. 


Tuesday, May 15, 2018

My Favourite Photoshoot Locations in Barrie!

I was just watching a video on Mango Street Photography’s YouTube’s channel where they give nine location suggestions for photoshoots. I couldn’t help but notice how many of them I have already used for my photos.  I thought I would give my favourite general types of  photoshoot locations in Barrie.

Alleys downtown: I love shooting in the alleys downtown Barrie. You almost always get a soft light and sometimes you can get some interesting shadows. Alley's also give you some great backdrops for your portraits. There are a few different alleys and laneways downtown that offer a variety of backdrops from bricks, to mason blocks to concrete and more.


Downtown Parking Garage: Another favourite location for photo shoots. Barrie only has one public multilevel parking garage and for a photographer it gives a multitude of different backdrops, lighting options and more for your photographs.


Stairs and Fire Escapes: Stairs and fire escapes can also offer some great locations for photo shoots. You can get some great angles for your photos, either shooting upward, downwards or straight on towards the model. There are many different stairs and fire escapes downtown and each can give their own look to your photos.


Parks and Gardens: Parks and city gardens have always been popular locations for photographers and artist for centuries. Barrie has some great gardens for photo shoots, but two of my favourites are Heritage and Sunnidale Parks. Heritage Park offers some great backdrops, including the waterfront. Sunnidale offers a wide variety of backdrops including trees, flowers, sculptures and buildings. There are many others parks in the city that I have yet to shoot in but will eventually.


The Go Train Station: I have only shot here once, but I will for sure go back. This location is best used on the weekends when it isn't so busy. There are a few different areas to shoot within the station. You can have the upper levels with the big windows that offer great natural light. You can use the tunnel under the tracks that offers some interesting backdrops. There is also the ramps, the platforms and if you time it right you can have the trains as a backdrop.


City Hall: City Hall offers some interesting lighting and backdrop options as well. The covered walkway is great when faced with bad light. The courtyard offers some options, during the winter it is a skating rink and the summer it is a fountain. There are benches all around the courtyard as well.


There are many other photoshoot locations with in Barrie that I want to try but haven't done so yet. All you have to do is use your imagination!


Sunday, April 22, 2018

Bringing area photographers together!

Last year I took a look at the local photography community there seemed to be missing a social "network" in place to allow local photographers a chance to connect with each other. There are local photography clubs, but these charge a yearly membership fee. There was no one organizing free social get togethers. So I decided to start a free Facebook group that is now called Simcoe County Photography Socials.


The aim for the group was to help organize, and give people a place to organize their own, photography get togethers such as photowalks, group shoots, and field trips. It took a while to get interest in the group to happen but now almost a year later we have 57 members. We also decided that so many of the members of the photographers are portrait artists we decided to open the group up to local models to give them a place to meet local photographers in a safe setting.

So far our main event that we have been hosting is what we have been calling our "Coffee Socials". It is essentially a informal get together of so far mostly photographers but we have had a couple of models come out. It started small, the first coffee social we held only had five of us show up. That was October 2017, seven months later we had eleven people show up yesterday and we fifteen for the March 2018 social. The events are getting more and more popular.

We are hoping that starting next months the weather will be warm enough, and the ground dry enough that we can move these socials outdoors and hold them in local parks. We hope by having them outside, where people can bring whatever food or drinks they want (non alcoholic of course) that we may get more people out, and it will give people to opportunity to shoot more, especially if we get more models coming out.

We also hope to expand things to include photo walks and outings. We are hoping that we get more photographers who are into other genres such as landscapes and street to start coming out out. I want this group to continue to grow and evolve. Even thinking of trying to organize a gallery showing for the members to display their favourite works. The "sky's the limit" as far as things we can do with this group.

Check out our facebook group if you live in or near the Simcoe County area in Ontario Canada.

https://www.facebook.com/groups/111946239345253/


Thursday, March 22, 2018

"The Ballet of the Street"

Lately I have fallen in love with photography based podcasts, I listen to them when I am alone in my car. Earlier today I was listening one of the latest editions of The Candid Frame, one of my fave podcasts. The host of the show, Ibarionex Perello was interviewing Street Photography legend Joel Meyerowitz. During the podcast Meyerowitz, while trying to describe what street photography is and what the photographer is trying to capture (I am paraphrasing here) he used the term "The Ballet of the Street"!

This hit me like a brick, I had never heard that phrase before, nor thought about street photography in that way. However the more I thought about it the more the phrase made sense.

When you look at the street scene that you are try to shoot, or are looking for interesting things to shoot, it really does look like a primitive form of a ballet. Cars trying to avoid other cars, cars trying to avoid people, people trying to avoid people. Everything is moving in a huge choreographed dance, a beautifully awkward dance where everyone isn't completely sure of where they are supposed to be, where their "marks" are, or where their "partners" in the dance are going. Throw in lighting, shadows and colours/shades (depending on if you are shooting color or black & white) and you have an amazing "Ballet of the Street" that you as the photographer are trying to capture.

When you look at the scene you are trying to shoot, you can look at the main subjects of your photo as the "Lead Dancers" of the ballet. The people or things around them as the background dancers and the street itself as the scene props and backdrops, or even as the understudies to the "stars" of the scene.

You as the photographer can be thought as the orchestra director, or the choreographer or director of this amazing ballet that is the scene in front of your camera. And the people who look at your pictures are the audience in attendance of the ballet.

Some "ballets" become famous, some have a limited run. The same goes for a street photograph. A few become legendary, but the vast majority of them are never seen or if they are they go unappreciated by the masses. We can only strive to become the most accomplished "choreographers" we can, to capture the best "ballets" that we can. I may never look at Street Photography in the quite same way again.


Sunday, March 11, 2018

Review:APUTURE'S AMARAN LED RING FLASH AHL-HC100

This is a quick review of the Amaran AHL-HC100 LED Ring Flash from Aputure . This flash unit is designed for use in Macro photography but is also useful for product and portrait photography. I received the flash unit from my Wife for Christmas.

This flash unit works in manual mode settings only and does not have digital control meaning that you cannot set it based on Aperture or Shutter speed settings and it doesn't have TTL capabilities. It requires a little "trial and error" to find the right settings for whatever type of photography you are doing.

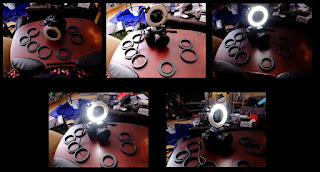
With some practice however the flash unit becomes a very versatile photography tool. It can be set up on the camera in two different manners. It comes with a  hot shoe mounted power pack/controller that runs on AA batteries. The ring flash unit is attached to the power pack by a cord and can be mounted on the pack or mounted on the end of the lens with one of the size adapter rings that are included with the unit. The flash also has two different lighting options as well, it can be used as a constant light and as a traditional flash. In traditional flash mode the light has a modelling light to allow for easier focusing. It can be used in three different lighting options, full, left half or right half. It can also be used with the flash unit off camera either hand held with the power unit still attached to the camera or with the whole flash unit off camera and operated via flash triggers.


Like I said the unit is designed for macro photography. It works especially well for this mounted on the end of the lens. I tried it out on some flowers and it worked really well. Keep in mind I was using the Canon 50mm f1.8 lens which isn't that good for macro. I should have used my 18-55mm kit lens.


I have also used the flash for some product style photography. For these I used some of "Firefly" television show collectibles and my table top studio (will be covered in another post). I used the flash both on camera and off camera and it worked really well for product style photography.


I also tried the flash in it's on the end of the lens set up to shoot a portrait. The flash worked well for fill light in daylight and also gave nice little "catch lights" in the eyes of the model. I haven't tried it for a night shoot yet but as fill light on a daytime shoot it works really well.


All and all the Amaran LED ring flash from Aputure is a very versatile and useful photography tool that will really open up your photography options and help you create some fantastic shots. I highly recommend this flash unit to everyone.